
Why I Got the 75 Gallon Tank
The 75-gallon tank was my first foray into serious reef keeping. The tank before this one was my first reef tank and was a 55-gallon tank without a sump and with a canister filter, blasphemy! After many years of ups and downs, I was at a crossroads where I could either get out of the hobby all together or dive in and do it right from the beginning of a build. Luckily I choose to stay in the hobby and do it correctly. I spent much of my time researching all aspects of the hobby through books, the internet and concluded that I would build my reef tank set up.
For this tank, I choose each piece of equipment myself and put everything together into a very successful system. My reef-keeping skills and experience increased light-years building this tank and building up to a very nice system. I took on many DIY challenges like drilling the tank and researched each component in-depth to try and find the best mix of equipment that would lead to a successful reef tank. After two years the tank continues to thrive with an excellent mix of coral and livestock. The tank is very stable with smaller weakly water changes and general maintenance.
How I Acquired 75 Gallon Tank
I researched, selected, and installed each of the components on this tank. At the time I had a full-time job and was going to college full time as well so I was on a pretty tight budget and time. I made sure to keep a budget and took discounts where I could find them. After selecting a spot in my house I concluded that a 4-foot long 75-gallon aquarium would be the best option. I looked at a lot of options and found that the 75 gallon Marineland aquariums sold at my local Petsmart were a great value. They also came with a stand that looked nice and was very open on the inside. The space on the inside was very important so that I had enough room for equipment. This was an issue in my 55-gallon tank as I had to cut a hole out of the bottom of the elevated stand to get the sump and skimmer to fit.
I sat back and waited for the right time to buy. After waiting a month I deployed an amazing strategy and bought the tank at a steep discount. First, Petsmart had one of their regular sales so the tank was on sale, to begin with. Second, I purchased a gift card online that saved me 12%. Third, Petsmart was offering a 10% discount for ordering online and picking up in-store. All in all, I paid $212.50 for the tank, stand, and a freshwater led strip, a pretty good score.
The tank and stand were light enough for me to carry on my own and I was able to load and unload it myself. I’m relatively strong and it was just about at my max lift to not jeopardize safety or damage the tank, so I would recommend a two-person lift for tanks 75 gallons or greater.
Tank, Stand, Drain, and Covers
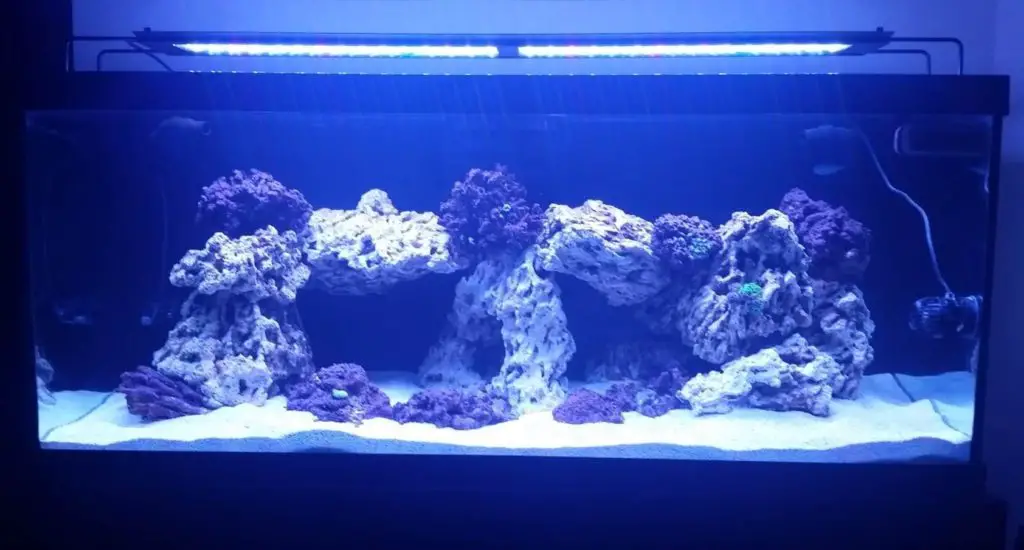
The tank is a Marineland 75 gallon glass tank that measures 18″L x 48″W x 21″H. The glass and silicone were very well done and I didn’t have any issues with leaks or scratches. The tank was not drilled and I planned on plumbing it myself with an overflow and Herbie style drain. I made sure to purchase a tank without tempered glass as those cannot be drilled. The stand is great for the tank. It is completely open inside and the bottom board is directly on the floor to maximize the space. The wood is not the best quality, but it has worked fine without issue in the years I’ve had the tank.
The tank came with a set of glass top covers. I felt that using these would diffuse/block the light for corals and switch the glass covers to DIY window screens. I also painted the back of the tank. Painting the back of the tank was very easy. I first used blue painter’s tape to tape off the edges and any other areas I didn’t want to be painted. I used a Rustoleum brand oil-based paint and painted it on the back using a roller. I applied a very thin initial coat and followed up with 3 additional coats after each coat dried.
The tank was not drilled but was also not tempered glass so I drilled it myself. I watched a lot of YouTube videos and consulted with my LFS before drilling. The day of the drilling was nerve-wracking and I had my wife hold the hose while I drilled. I made sure to buy the correct diamond drill bit, placed a towel where the glass piece would fall through the hole, had my wife hold the water hose over the drilling, and slowly drilled the hole making sure that the drill bit did 95% of the work. It was super easy and I drilled nice clean holes without issue. For the overflow, I used a company that is no longer around called GlassHoles.com to supply me with a nice acrylic overflow box. I used aquarium silicone to attach it to the middle back of the tank. I set up a Herbie-style drain and when dialed in is pretty much silent. I used LocLine returns on both the left and right sides of the tank. I hard plumbed the drain and return lines. I also plumbed gate valves on each line to fine-tune any part of the system. I highly recommend using gate valves over ball valves, especially with a Herbie-style setup. Gate valves make micro-adjustments possible so that you can adjust the Herbie overflow to the water level in the overflow drains nearly dead silent. Cheap ball valves also tend to get stuck over time making it very hard or even impossible to adjust.

The Complete Guide to Hard Plumbing in a Reef Aquarium
Live Rock, Substrate, and Refugium
I used both live rock and sand in this build. I used some of my old rock from my first tank and added 50lbs of Bulk Reef Supply Pukani dry rock to the mix. I find Pukani to be an excellent value. It is very porous meaning you get more for the weight you buy and increased surface area for beneficial bacteria. I mixed the rock in the tank with the sand and let the tank cycle before adding any livestock. This was a rather quick process primarily because I mixed the rock for my established tank and used a couple of bottles of Bio-Spira.


I added fresh sand to the build. I went with a bit of finer Oolite sand as I planned to have fish that filter and dig in the sand. I went with 120 pounds of sand and on average there is probably about a 3-inch sand bed throughout the tank.

I set up the refugium with live rock rubble and Chaetomorpha. I did find that the live rock rubble did trap a lot of detritus over time and it would be replaced with a couple of pieces of live rock to help keep the refugium from becoming a nitrate factory. I also seeded the refugium with copepods from Algae Barn and have successfully kept a Mandarin Goby in the system.


Live Stock and Corals
Fish
- Yellow Tang- One of my quintessential reef tank fish, the Yellow Tang. These are one of my favorite fish and I’ve found to be great reef tank fish. I always only kept 1 Tang in the 75-gallon tank and this Yellow Tang has always been a model citizen.
- Black Clownfish- When I first got this Clownfish it had an orange face with a black and white striped body. This fish grew rapidly and now there is just a slight tint of orange on its face. I’ve always liked the black and white striped Clownfish and this one is a great specimen. Though the fish has never hosted in any of the coral it spends most of its time in one of the back corners shooing other fish when they enter its territory. Also, if I happen to be doing maintenance in the area it will nip at my fingers.
- Bicolor Blenny- One of the family’s favorites. This fish likes to snake between the rocks and can often be found poking his head out of one of the rocks. A very peaceful fish with lots of personality.
- Banggai Cardinal- One of the most available reef tank fish out there, but still a very beautiful fish. This fish primarily sticks to itself usually hanging out under rock shelves.
- Flame Angel Fish- Another one of my favorites. The Flame Angel has vibrant colors like no other. This has been a great fish and I have rarely seen the fish harass corals which they are occasionally known for. My Flame Angel is probably the most aggressive fish in the tank. The fish will occasionally bother smaller fish, but nothing too serious.
- Watchman Goby and Tiger Pistol Shrimp- Probably my favorite symbiotic relationship in the reef tank hobby. It’s always fun watching the two interact. Often we will see the Pistol Shrimp push the Goby out of the way as he excavates the substrate around their hole. The Pistol Shrimp is also very cool as we occasionally hear him clacking his claws at other fish getting too close.
- Mandarin Goby- A visually striking fish with vibrant colors and psychedelic patterns. I was worried about keeping one of these, but since incorporating a refugium and seeding it with pods, feeding this guy hasn’t been a problem. One of the shyer fish in the tank he tends to hide in the rocks once he spots a family member staring at him.
- Cleaner Crew- I keep various hermits and snails in the tank as part of the cleanup crew.
Coral
- Green Birds Nest- This is a quick-growing easy to care for coral. It doesn’t have the greatest coloration but with its multiple sharp points gives a very cool natural reef look to the tank. I started with a $10 4 inch frag and it’s grown to two large colonies that I constantly frag.
- Green and Purple Hammer Coral- One of my favorite corals. The coral has a nice dark neon green with purple splattered throughout. This started as a 4 head frag and has blown up to 20-30 heads the last count.
- Green and Purple Tip Frogspawn- Another nice coral with green polyps and purple tips. This started as a tiny 1 head frag and has blossomed into 10+
- Green Star Polyps- One of my legacy corals from my 55 gallon tank. This spans about a foot across the bottom of the tank across a few pieces of rock separate from the main structure. I have to frag this constantly to keep it off the main structure. Very easy to care for and has a great green color that waves in the current.
- Random LPS- I’m not quite sure what this LPS frag is, I bought it from my lfs as a random tiny $5 frag. I bought it simply to see if an LPS would work in the tank. It was tiny when I bought and has grown nicely over the last two years. It looks like a mini bonsai tree in the tank.
- Pipe Organ- Another one of my legacy corals from my first tank. This was one of the first real corals that I’ve ever bought. It’s fallen off it rock many times and has been fragged up multiple times and continues to grow and grow rapidly. A weird coral that grows mostly vertical with a structure just like its name implies. I constantly frag this piece and have donated many pieces to my local LFS.
- Duncan- This started as a single head Duncan and at last, the count has 20+ heads now.
- Zoas- The tank doesn’t typically do well with Zoas but some of the many that I’ve tried have flourished. Currently, there are Utter Chaos, Darth Maul, Dragon Eye, Eagle Eye, and Hawaiian Punch Zoas in the tank.
- Mushrooms- There is a colony of green and purple mushrooms in the tank.
- Trumpet Coral- Right in the middle of the tank are three large colonies of purple trumpet corals. These are very healthy and constantly popping out new heads.
- Candy Cane Trumpet Coral- Another healthy colony of coral. This has about 20 heads and is thriving.
- Sunset Montipora- This has been growing well in the tank, but is starting to be shaded by the LPS coral in the tank. It is the encrusting variety and looks kind of like strawberry skin.
- Green Trachyphyllia Brain Coral- A nice brain coral that sits on the sand in one of the front corners of the tank. Very easy to care for coral that doesn’t seem to mind low flow and low light.
Reef Tank Gear
Sump – Eshoppes R-200 3rd Gen: I got an amazing deal on this sump. It was listed as a return in great shape on Amazon and I ended up paying only $173 for this sump. When it arrived it was in basically new condition with no issues, only the box had been opened. Overall I have mixed feelings about this sump. It looks great and is well built. The sump has also performed well. My issue is that the return section of the sump is behind the fuge and you cannot see your return pump from the front at all if there is a wall behind the sump. This has not been my favorite thing with the sump, but so far it hasn’t been an issue. I also felt that the fuge compartment is a little small. Looking back I would probably rather go with a sump that has its own compartments that stretch from the front to the back in each section.
Lighting- From the beginning, the tank has been lit by Marine Depot’s Aquamaxxx Nemo led light. I was skeptical about this light from the beginning, it looks like a freshwater led strip light and was relatively at a much lower price point than other reef led lights. The watts on led were pretty comparable to other lights on the market at the time though. I have been extremely happy with this light. It is a very slim led light fixture that nearly spans the entire width of the tank. I didn’t want to venture into high-need SPS coral in this tank and the other LPS coral I’ve kept under this light have grown to mother colony sizes. One of the best values I’ve had with this tank and there is an updated version available.
The system came with a nice slim freshwater Marineland led light fixture. The fixture runs almost the entire length of the tank and is very slim. I found an excellent use for this freshwater light, by using it to light the under the cabinet. I mounted this under the stand using simple brackets and screws. It fit perfectly and lights up the entire cabinet very well. I took the additional step to connect the light to my Neptune Apex Controller through the break-outbox. I connected door magnets on each door and wired the magnets to the Neptune Apex Breakout Box. Programming the magnets to the outlet was a breeze. I used the following code to turn on the stand light any time either of the doors opened. This feature has been one of the most useful additions to the system.
1 Fallback ON
2 Set On
3 If Sw1 Closed Then OFF
How to Setup Aquarium Stand Lighting and Program to Turn on Automatically When Doors Open
For lighting the fuge I initially started with a cheap hardware store dome fixture and generic led grow bulb. I eventually upgraded to Aquaillumination’s Prime Fuge light. This light has been great and grows Chaeto extremely well. I run the light about 12 hours a day and harvest a large ball of Chaeto about every three weeks.

Heater- Heating the tank are two 75 watts, Eheim Jagers. I find these heaters to be a great combination of price, value, and reliability. I have both connected to my Apex controller for safety. I have both these in the sump and have my Neptune Apex temp probe in the same area.

Chemical Filtration- I use both GFO and Carbon on this tank. I have a Bulk Reef Supply Dual Reactor plumbed into the return to feed the media reactor.
Skimmer- I initially had my original Eshopps 120 skimmer skimming this tank. I eventually added a frag tank and moved the 120 to the frag tank. On the 75 I upgraded to an Eshopps Axium x-120 skimmer. Both skimmers have worked great right out of the box. Both of these skimmers have Sicce pumps powering them and I find it to be a great mix of value and price.
Electrical- I built a small electrical board that attaches to the left inside wall of the stand. Having a board has helped with cord management and access to outlets and equipment.
For a controller, I was able to secure a great deal on a Neptune Apex Classic Controller. My local fish store had a used system and he sold it to me for just $200. I love having the controller on the tank and probably wouldn’t go without one in the future.
ATO- For ATO I use two float switches connected and programmed into the Apex Controller. I purchased the float switches from Marine Depot that attach to the sump via magnets. I have one to measure the water level and trigger a refill, and another switch to reading a high level and shut off the ATO Pump. This has worked for years without fail. I occasionally clean the switches to ensure they don’t stick and test them to make sure the Apex is reading them correctly.
For an ATO container, I use a simple 7-gallon blue Aqua-Tainer that sits directly next to the sump. Pulling water from the container is a Rio 50 pump. I find the Rio 50 pump to be a perfect pump for ATOs. You can find this pump at a great price and I’ve found them to be very reliable. This container fits perfectly next to the sump and even allows space for two-part jugs that I currently hand dose from daily.


Return Pumps- I use a Sicce Syncra 3.0 to return water from the sump to the tank. I also have my media reactor plumbed to the return line. The Sicce pump is a workhorse that is pretty quiet and very reliable. I only clean the pump a couple of times a year and it has never had a breakdown or issue.

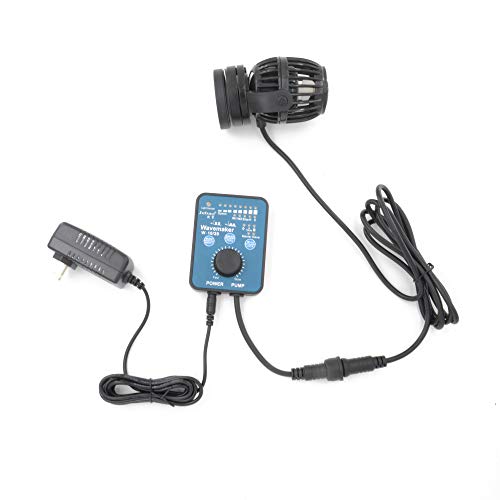
Power Heads- For powerheads, I used my old Hydor Koralias initially. These were sufficient but I’ve found that somewhere between years 1-3 these powerheads would just up and fail almost randomly. When that happened to the two I was using, I replaced them with small Jebao powerheads. The Jebaos work well are priced nicely and are controllable.
Maintenance Schedule
Pretty religiously I change 10 gallons of water every week. Occasionally I push it out to every other week, but that doesn’t happen often. I change the filter sock every week and GFO/Carbon every month. The glass is cleaned every week as well. Other in-depth maintenance happens on various schedules throughout the year like cleaning of powerheads and skimmer about every quarter of the year.
How to Clean Your Reef Aquarium Sump, a Practical Schedule
Future Plans for the 75 Gallon Tank
Everything seems to be going well with this tank as it is very stable and the livestock are all thriving. I don’t plan on changing much unless something goes down. I may try a DC pump on the return in the future and perhaps upgrade the powerheads at some point. I’ve had a couple of Diamond Gobies in the tank at different times and 1 jumped out and another vanished. The sand can get a bit dirty if it is not siphoned regularly and I would like to have another Diamond Goby or other sand sifter to help with this in the future.
Continuous maintenance and fragging of corals is the plan with this tank for now. Maintaining this tank, a separate frag tank, and a 210-gallon tank is a bit much. In the future, I may look to plumb in a large frag tank into the 210 gallon and shutdown the frag tank and the 75 gallon tank, but for now, I will keep this one up and going.
The 75-gallon mixed reef tank was me seriously diving headfirst into the wonderful saltwater aquarium hobby. By piecing the system together myself and taking on many DIY challenges my reef keeping knowledge went through the roof. I have grown attached to the fish in the tank and the coral colonies. I learned an incredible amount of information from my local fish store, YouTube, and books to help me in my journey. I think my biggest lessons learned in this build were patience is key to success in this hobby and consistency over time with tank husbandry will lead to success. Building the system yourself takes research into each piece of equipment and analyzing what will work best in terms of cost, reliability, and performance in the aquarium.