Since setting up a Brute water change station for my 210-gallon reef tank, it’s been great having on-demand pure RODI 0 TDS water. In addition, my regular water change efficiency has been greatly improved. I originally acquired my 210-gallon reef tank used and it came with two 44 gallon Brute trash cans that the previous owner used for making saltwater for the tank.
After moving the 210 to my home and setting it up, to change water on my 210-gallon reef tank I would brew saltwater in one of the cans and use the other tank to drain water out of the tank where I would then pump it into an area of my yard where I didn’t want anything to grow. I have a septic system on my home so draining a lot of saltwater into it isn’t an option.
Ten Tips for Moving a Large Established Aquarium
After much research, I found that a water change station would be a great addition to my reef tank and would improve my tank parameters and improve my maintenance process during regular water changes. On my 210-gallon reef tank, I have a 50 gallon Low Boy frag tank plumbed into it and a 10-gallon Chaeto holding tank sitting next to it.
How to Set up a Simple Chaeto Holding Grow-out Tank
The frag tank and the Chaeto tank sit on a tall Craftsman workbench next to the 210-gallon reef tank. The two Brute trash cans and salt buckets fit perfectly under my frag tank and chaeto tank, so I wanted to design a water change system in the same location while keeping the Brutes. Read on to learn how I built the water change system using Brute trash cans.

What are the Benefits of a Water Change Station for Your Reef Tank
A water change system provides high-quality pure water for your reef tank and can make your water change life easier. In a typical water change station, a water source in your home is tapped and water is delivered to a RODI filter system. The water is purified and sent to a holding tank such as a Brute trash can.
The water can then be moved into another container to be mixed as saltwater and brought up to temperature. It’s always recommended to use RODI water on your reef tank as contaminants and chemicals may be present in your water and can have a detrimental impact on your reef tank. Even if you have a pretty good water source you probably don’t have control of how it is processed and it can change over time. I’ve seen where reef tank owners who use city water experience a catastrophic die-off in their tanks due to the local water companies adding a new chemical to the water.
One way to test the quality of your water is to measure total dissolved solids or (TDS). This measures the number of salts, metals, and other dissolved solids in your water. A reef tank should use 0 TDS water to ensure that nothing unwanted contaminates your reef tank. 0 TDS can be accomplished by the use of a home RODI filter system You can send samples of your water to various online testing services or by using a TDS meter.
A water change station can also make your reef tank maintenance easier. With water change systems an external pump is utilized to move water from one container to the next when they are side by side. An outlet can be installed with an attachment for a hose that can make adding water to another section a breeze by turning on the pump and opening the valve to the hose outlet. Mixing up a batch of saltwater is also a breeze. All you have to do is move water from the RODI bin to the salt bin, add salt, and mix by closing valves and having the pump continuously mix in the Brute.
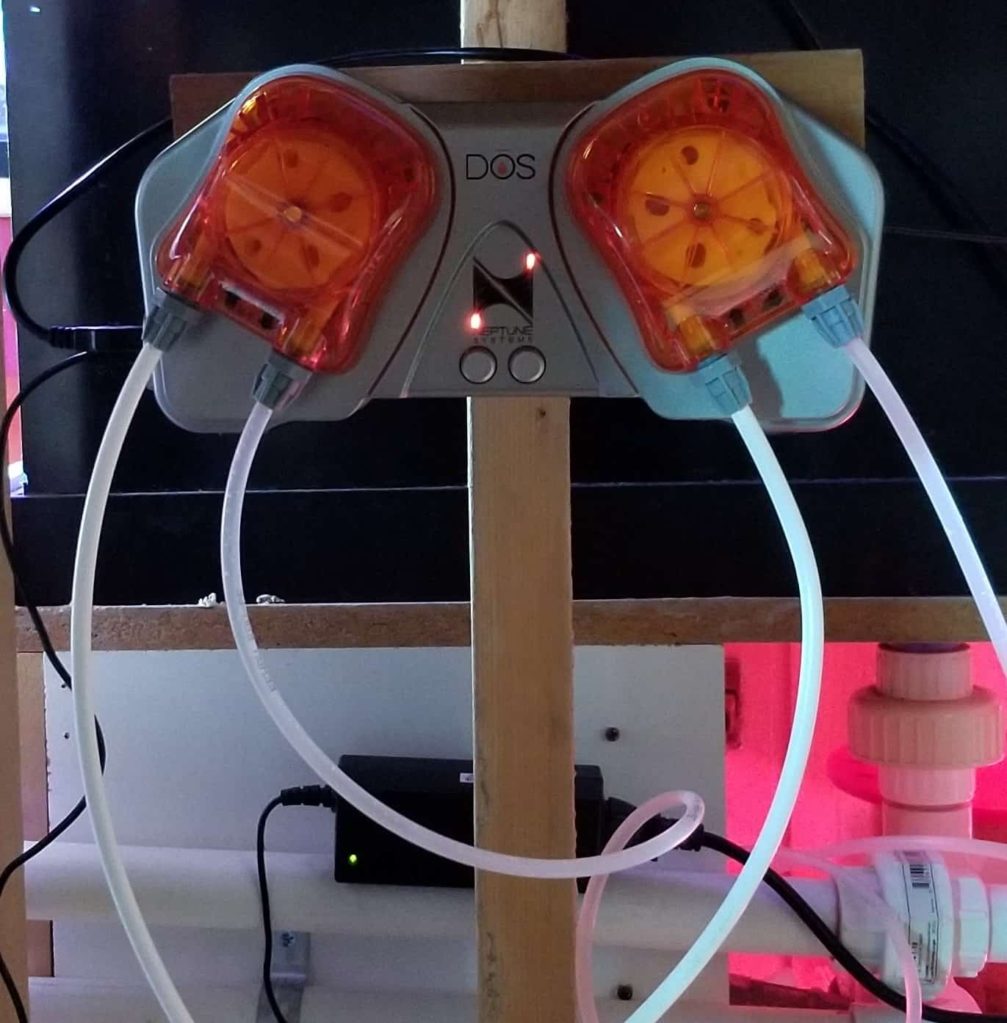
The saltwater can be stored here until you need it, effectively giving you on-demand saltwater. My process improved greatly as all I have to do now is drain display water and then pump from the water change system back into the tank. Eventually, you can hook up an automatic doser like the Neptune Systems DOS to achieve automatic water changes. Automatic water changes are the next step towards a super low maintenance tank and removing one of the more tedious tasks in reef keeping the water change.
The other thing you have is on-demand RODI water for top-off. If you don’t make RODI water at home you typically have to get it from a local fish store or a grocery store. Based on how much these are used and the time between when filters are changed you may not be buying 0 TDS water. TDS is simple to measure and can be done at the RODI filter itself allowing you to make sure that 0 TDS water is being produced and you control when to change filters and media as needed. Over time, not having to pay for RODI water can save you in the long run.
Equipment and Tools Needed to Make a Brute Water Change Station
Equipment
Pump: First choose a pump that is cable running outside of water. Then look for the appropriately sized pump. The size will vary depending on what you want to accomplish. If you need to pump water across your house to your tank you’ll need to size your pump accordingly to how many gallons it is capable of minus the length of the run and other factors like valves, elbows, and vertical feet.
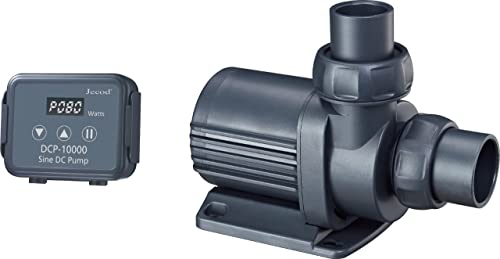
The logic that I took when choosing a pump was to oversize the pump so that I could use it as a backup for my 210-gallon return pump. I run an EcoTech Marine Vectra L2 on my 210 so for a backup and for my water change system I went with a Jebao DCP-10000 Sine Wave pump. This pump has worked well for me. Being a DC pump it is super quiet and can be controlled to lower or increase the gph rate. I crank it up to mix salt quickly and lower it when I have time to mix slower. The Jebao DCP-10000 is a bit overkill for the water change system, but it is nice to have a backup pump ready to go for my display tank.
Jebao/Jecod DCP-10000 Submersible Return water Pump Reef
Sine Wave Return Pump, super mute, smooth, more efficient. No Copper components, Suitable for marine and fresh water. Super Quiet Operation and Memory Function for Power Supply Off to recall memory.
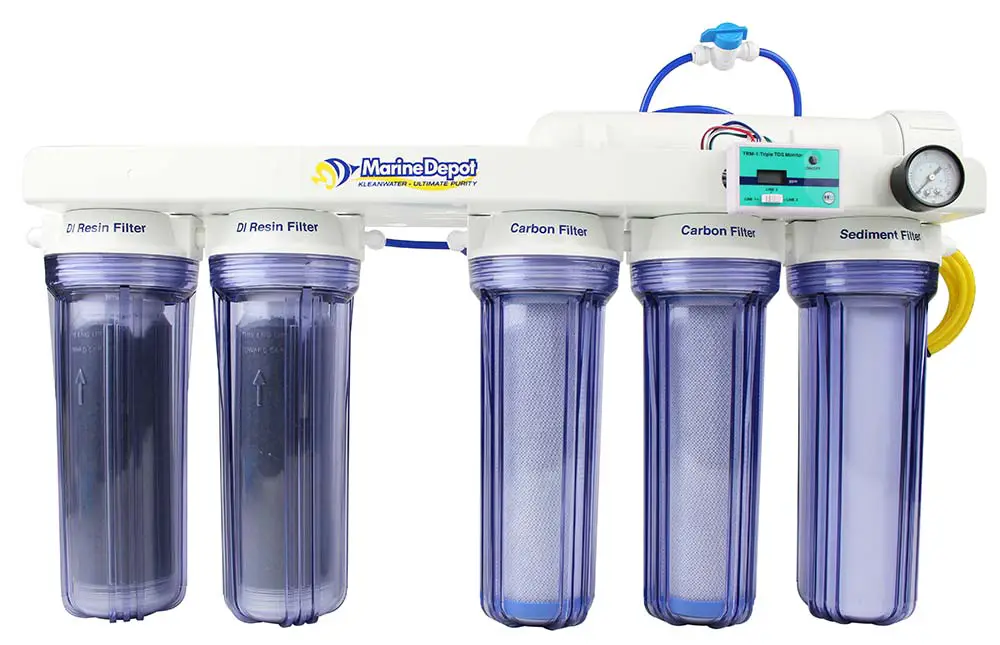
RODI System: Many RODI systems on the market can be used to produce RODI water for reef tanks. RODI systems have different stages that the water goes through, and the number of stages required depends on your source water quality. The different RODI stages are mechanical filters, membranes, carbon, and DI resin stages to get to 0 TDS water. Here are some factors to consider with the number of stages:
4 Stage – Good starter system for water that is treated with low amounts of chlorine and low levels of minerals.
5 Stage – An extra filtering stage to increase the filtering capabilities in removing chlorine and other dissolved solids.
6 Stage -Used to remove excessive TDS and hard-to-remove items like phosphates and chloramines.
7 Stage – Can be used on just about any water source to get to 0 TDS.
On my set up I use a Bulk Reef Supply 4 Stage 150 GPD Value Plus RO/DI System. My source water comes from a well with no additives and lower amounts of minerals. The 4 stage works well for me and I don’t go through filters any faster than normal time frames.
Heater
A heater can be used to get your saltwater up to the appropriate temperature before going into your reef tank. My favorite heaters to use for just about everything are the Ehiem Jager heaters. I use a 150-watt version to heat the water in my salt mixing Brute container.

ReefSumper’s Recommended Heaters
PVC: To connect the barrels and the pump standard PVC is used. I used common white schedule 40 PVC top hard plumb the Jaebao pump and containers together.
PVC Fittings: Various PVC fittings are used to get the hard plumbing to the places you want it. I used true union ball valves, 90-degree elbows, garden hose adapter, slip unions, and tees.
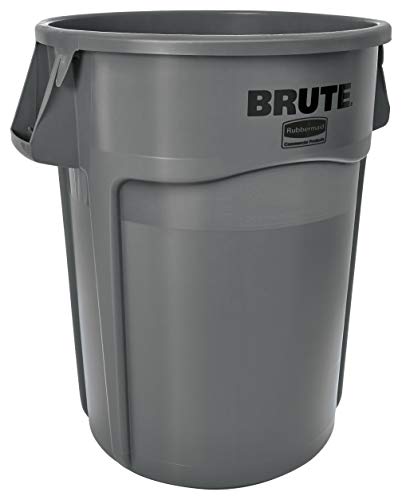
44 Gallon Brute Trash Can
Brute trash cans come in various sizes and any size can be used depending on the volume of water that you need at any point in time. I used 44-gallon Brute cans. One thing you want to consider is to make sure that you have equal-sized containers to help prevent overflows. If you leave the wrong valves open, you may pump water from the container to the other in error and if there isn’t sufficient volume to hold the water you will overflow and get water onto your floor.
Float Valve
I used a standard float valve in the freshwater Brute can. The RODI unit constantly creates freshwater and when it reaches a certain level in the brute can the float valve rises and cuts off the flow and production is stopped.

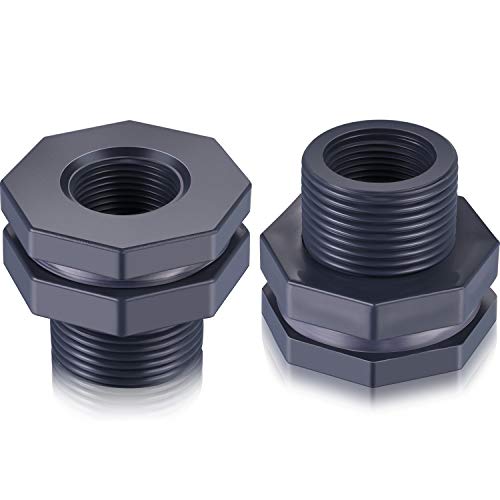
Bulkheads or Uniseals
At the points where PVC enters your Brutes, is where you may experience the most leaks. Typically, these points of transitions are provided by the use of bulkheads or uniseals. Bulkheads go through the Brute container and have a gasket and washer that tighten to make a leak-proof seal. PVC fittings can be screwed onto the bulkhead to start the plumbing. Uniseals are rubber seals that get pushed through a hole in the container. When PVC is pressed through the seal it expands to create a leak-proof seal. These are supposed to work well for curved surfaces like Brutes.
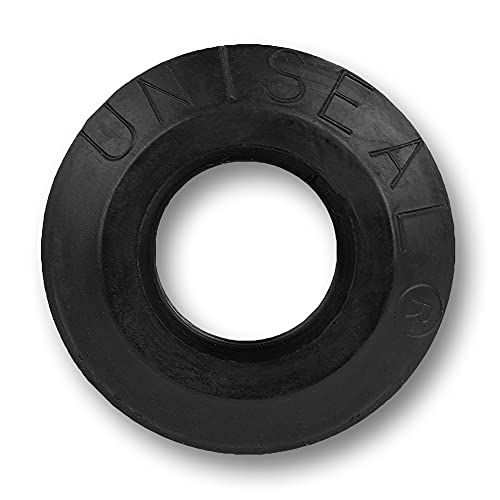
For my setup, I used high-quality bulkheads designed for rain barrels. I’ve used uniseals in the past but find that you have to have a perfectly sized and drilled hole for them to work leak-free.
RODI Water Lines: You will need extra water lines to connect your rodi system to your brute can and an extra line to get to other areas like your water source and drain. 1/4” water line is what is used.
Tools
PVC Cutters
I like to use a ratchet-style PVC cutter to cut PVC for my reef tank.

Measuring Tape: An essential item when plumbing a reef tank is a measuring tape. You’ll want to find one that can fit inside the PVC fittings you are using so that you get an accurate measurement when plumbing.
PVC Cement: PVC cement is used to permanently bond PVC and PVC fittings. I like to use clear PVC Cement as it is a clean look when finished.
PVC Primer: I want to have the best chance of a leak-free plumbing job, so I use primer on all reef tank plumbing jobs. Again, I use a clear primer as it gives a cleaner look at the end.
Hole Saw: Hole saws are used to drill holes in brute cans. You will need to drill a hole for the bulkheads/uniseals and the float switch.
Drill: A drill is used to drill the holes. I use a simple battery-powered drill to drill the holes in the Brute.
Setting up the RODI for you Reef Tank Water Change Station
Once you’ve decided on the right RODI system for you, it’s time to install it. The first step is to choose a location that will work best for you.
Considerations are where to get the water from, where to drain wastewater, how to send water to the water change stations, and how close do you want the station to your display tank.
For me, I was able to mount the RODI system directly behind my reef tank, close to a drain, and close to my water change stations. I was in the advantageous spot that my reef tank is in my unfinished basement and access to water, drain, and the tank was super easy. Once your location is secured, the next best practice is to mount your RODI system so that it is secure. I used screws and a two-by-four to secure the unit between two studs behind my tank.
RODI Systems typically have three water lines a red, black, and blue line. Here are what each does and how to connect them appropriately.
Red: Red is usually the intake line where a water source is delivered to the RODI system. The redline must tap into a water source. There are many options for this anywhere in your home where there is a water line there is usually a way to tap into it. Some of the ways this can be accomplished are to tee off a line and run it to the rodi system, use an adapter to connect the line to a garden hose or a sink faucet, use other forms of adapters to connect to existing lines. In my case, I had a freshwater line that runs to my fridge that I tapped into to deliver water to my RODI system.
I shut off the water valve on that line, used a shark bite tee connector, and ran a line from the tee to the RODI unit. One item to be aware of is water pressure going into the RODI system. You’ll want at least 40 PSI hitting the unit to produce water at a reasonable rate. Most RODI systems have a pressure gauge on it, or you can buy a pressure gauge to measure at a faucet. If you’re below 40 you can buy a pressure booster to boost the psi going into the RODI system. The right PSI will also help you preserve your RODI filters and membranes.
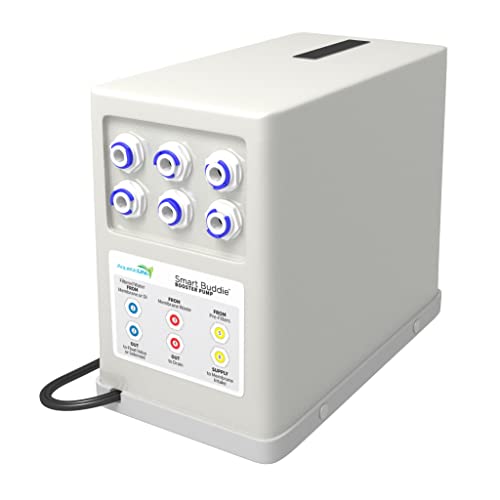
AQUATICLIFE Smart Buddie Booster Pump for 50-100 GPD Reverse Osmosis
Ideal for water supplies with low pressure, the Smart Buddie will boost pressure as low as 35 PSI to 90 PSI or more. This greatly increases the efficiency of the RO unit.
Black: The black line is wastewater. As the RODI system creates 0 TDS water, it rejects unclean water as wastewater.
It’s typically in the 4:1 waste to clean range. You want to drain this in a convenient spot in your house. Any sink drain will do. For my setup, I have a floor drain next to my system where I simply push the hose down to drain the waste.
Blue: The blue line is your fresh RODI water that is ready to be put into a top-off system or mixed into saltwater.
Connecting the RODI to the Reef Tank Water Change Station
Once you have your RODI installed it’s time to connect the blue line to your freshwater brute can. To accomplish this, I used a standard float valve.
Your RODI system will continuously create RODI water until the source water is cut off or until the blue line is blocked. To block the blue line from producing when it reaches a certain level in the Brute can I used a float valve. First drill a hole the right size for the float valve you are installing.
Push the float valve through the hole from the inside of the Brute and tighten the washer ensuring the gaskets are on the right side. In my case, I had gaskets on both ends. Once that valve is installed the blue rodi line can be connected to the float valve.

As the water in the Brute increases and reaches the float valve, the float will push up and close the valve stopping the production of RODI water.

This is an important connection to make sure is connected correctly leak-free and is functioning perfectly. Essentially you are continuously producing water and if the float fails you could end up with a lot of water on the floor. There are devices that you can set on the floor to warn you of any water on the floor and some that will even cut off the line if an alarm trips. Better to be safe than sorry when it comes to water and leaks in your home.
Plumbing the Brutes and Pump Together for the Reef Tank Water Change Station
Plumbing the Brutes together involves connecting the two via PVC with the pump in between them. The first step is to make it possible for the brute to transition plumbing via a bulkhead or uniseal. For my set up I used a uniseal at the top of my saltwater Brute and bulkheads at the bottom of both containers.
Uniseals work by drilling a hole in the brute and pushing the seal through the hole. When you push a piece of PVC through the uniseal, it expands to make a watertight seal. Uniseals are supposed to work well for curved objects like buckets, rain barrels, and Brutes.
One thing with uniseals is that you have to have an exactly correct hole size and the hole has to be pretty clean for it to be leak-free. With so much water volume I didn’t have the best confidence in uniseals so I went with bulkheads specifically made for rain barrels that I picked up at my local hardware store. I did use a uniseal at the top of the saltwater Brute as I never planned the water level to go as high as the seal.
Bulkheads worked great for my set up I had to tighten them a bit with a large adjustable wrench, but thus far they’ve remained leak-free. When I installed the bulkheads I drilled a hole installed them by pushing them through the inside of each brute can. I drilled the hole near the bottom of the barrel so that I could get most of the water out of the barrel when needed.
With the bulkheads installed on the two cans, the next step was to plumb the pump and cans together. I used the following PVC fittings to get the job done:
3/4” Schedule 40 PVC Pipe: General PVC pipe from a local hardware store
True union ball valves: I used 4 of these to control where I send water.
True Union Ball Valves
The American Valve P200U is a two-way blocking true union valve that seals in both directions. The handle doubles as a wrench for quick and easy disassembly without the use of special tools. The unique design allows in-line maintenance without disconnecting a pipe.

True unions are nice since they can be removed at will and they allow you to rotate plumbing making it easier to work with. I used regular white true union ball valves found at my local hardware store. If it is in your budget higher quality ball valves are easier to open and shut.
PVC Tees and 90-degree elbows: used to turn pipe 90 degrees and to tee off the line for a separate run.
3/4” unions: I placed these in a strategic location to make disconnecting the system easy when needed. You can rarely have enough unions in a reef tank or water change system.
PVC Garden Hose adapter: I like to use a garden hose to fill up ATO containers and move saltwater into my display tank. This adapter allows me to connect a garden hose to the PVC plumbing.
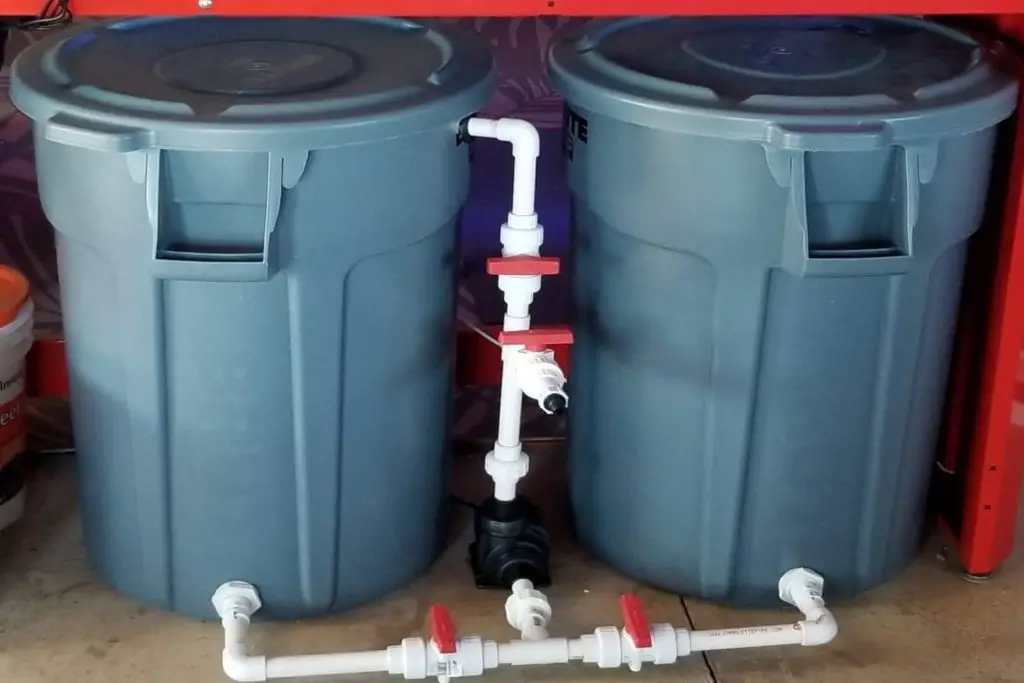
For my setup, I have the two Brutes connected at the bottom with a tee running to the pump. A PVC line moves up between the Brutes from the pump and tees off to a line that can connect to a garden hose. Above the garden hose, the line runs back into the saltwater Brute can.
Another option is to tee off the line at the top and run a line into the saltwater can and another into the freshwater can. This would allow you to move water from one can to the other and back and forth. I planned to exclusively use one Brute for saltwater and the other for fresh, so I only have a line into the saltwater can at the top.
Once you have all your PVC and fittings the next step is to dry plump your set to make sure everything is how you want it and properly measured. When measuring PVC it’s important to measure the inside of the fittings as their depth can vary from piece to piece and manufacturer to manufacturer. Once everything is to your liking, then glue your pipes and fittings together. I use clear primer and cement on all my reef tank plumbings to help with long-lasting leak-free jobs.
Leak Testing the Brute Water Change Station
You want to wait a couple of hours for your plumbing to dry before leak testing and a full cure should happen over a day or two. There isn’t much pressure on the PVC and fittings in most water change systems and reef tanks so I did not have any issue leak testing after two hours of finishing the plumbing. I started with a small amount of water at the bottom of both barrels to check for leaks at the bulkheads and added about 1/3 full of water to put additional pressure on the bulkheads. I did find myself having to tighten one of the bulkheads about a 1/4 turn with the wrench for it to seal up. Next, I turned on the pump and pushed water through each of the lines to ensure it was leak-free. When using primer and cement I rarely find leaks.
The Complete Guide to Hard Plumbing in a Reef Aquarium
Operating the Brute Reef Tank Water Change Station
My water change system has 4 functions and they are accomplished by turning on and off the ball valves while the pump is running. Here are the 4 functions and how to achieve them:
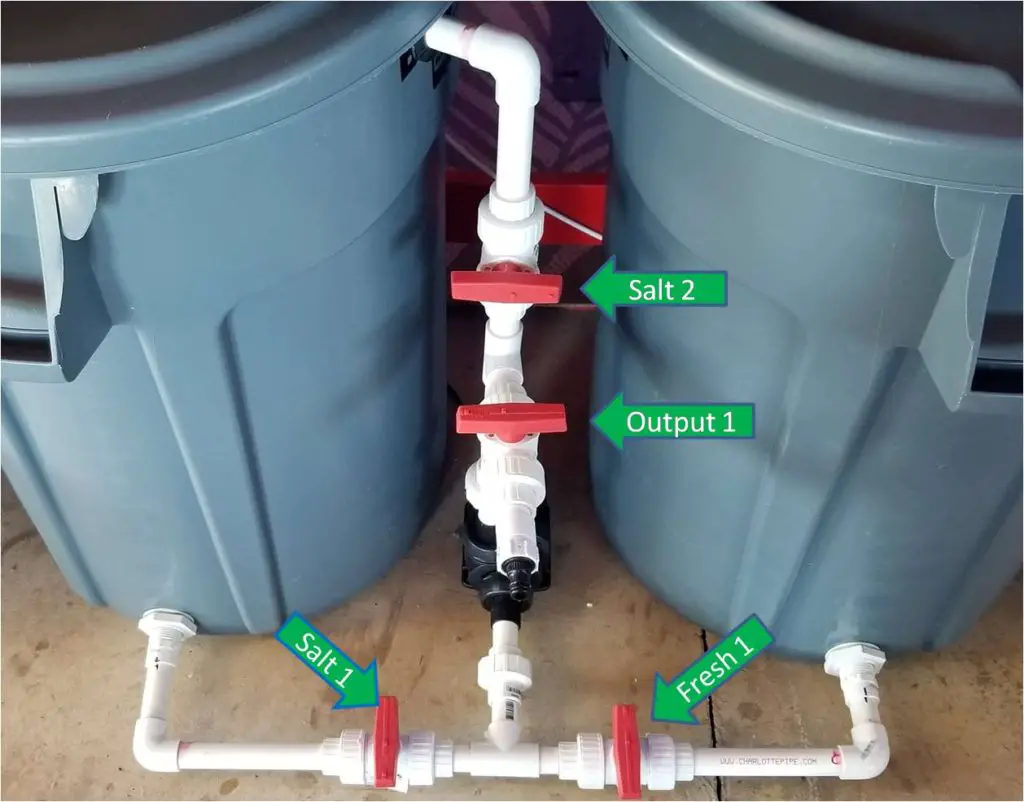
Moving fresh RODI water to the saltwater bin: After making fresh RODI water I move it from the fresh Brute to the saltwater Brute for mixing.
Fresh 1: Open
Salt 1: Closed
Salt 2: Open
Output 1: Closed
Moving fresh RODI water to auto top off container: My ATO container is close to my water change station so I use a marine garden hose to move water from the freshwater Brute to the ATO container
Fresh 1: Open
Salt 1: Closed
Salt 2: Closed
Output 1: Open
Moving Saltwater to display tank or other containers: My 210-gallon tank is close to the water change system so I use the garden hose to fill it when doing a manual water change.
I also have a 75-gallon mixed reef tank on another floor of my house. For the 75 gallon tank I typically only do a 10-gallon weekly water change and use buckets that I fill at the water change station and take to the tank.
Fresh 1: Closed
Salt 1: Open
Salt 2: closed
Output 1: Open
Mixing and circulating Saltwater: After moving water from the fresh Brute to the saltwater Brute I add salt and a heater to have water for water changes. By closing valves, the pump can continuously circulate water in the saltwater Brute making mixing very quick.
Fresh 1: Closed
Salt 1: Open
Salt 2: Open
Output 1: Closed
Next Steps for My Brute Reef Tank Water Change Station
Setting up the Brute water change station was a game-changer for my maintenance process and it ensured that my tanks are getting high-quality TDS free water at water changes and during auto top off. One thing that’s intrigued me is the ability to remove manual water changes from the equation altogether. One way to accomplish this is to use a Neptune DOS to daily pull water out of my reef tank and simultaneously add fresh saltwater back into the tank. It just so happens that when I purchased my tank used it came with a Neptune Dos that was not being used. This is something that I am going to experiment with next.
Another possibility is to auto-fill my auto top-off container. I’ve heard that this can be risky massive flooding if it goes wrong, but it might be something I look more into in the future.