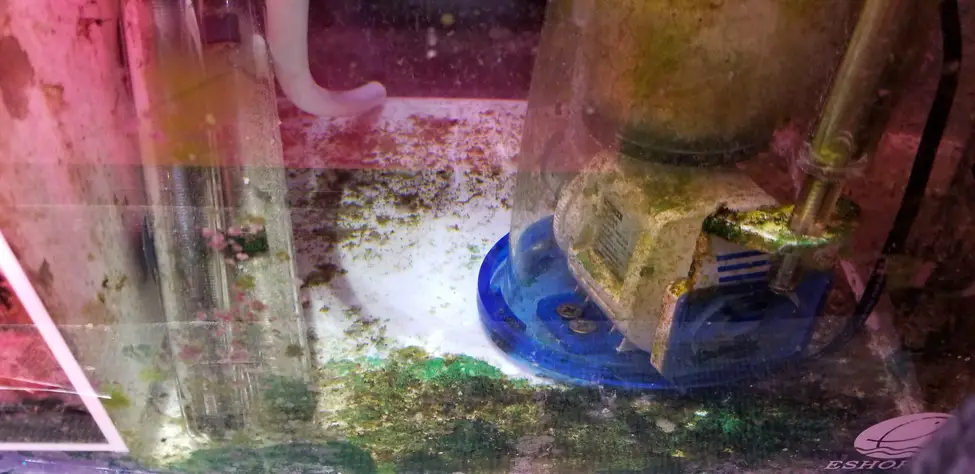
After about a year and a half of being operational, my 75-gallon reef tank’s sump was very dirty. There was quite the buildup of detritus and algae on the bottom of the skimmer section of my sump. I had also used live rock rubble in my refugium and found that there was a large build-up of detritus between the rock rubble pieces and on the bottom of the refugium. I was also starting to have water quality issues in the tank manifesting in not as healthy looking coral and algae bloom in the display.
I knew that the detritus build up in the sump was probably not a good thing as the waste build-up was continuously breaking down into dissolved organic waste and increasing the levels of nitrates and phosphates in the tank. I wanted a way to clean my sump without whipping up the detritus and reintroducing it to the water column. I also wanted to remove the live rock rubble and thick detritus layer in the refugium.
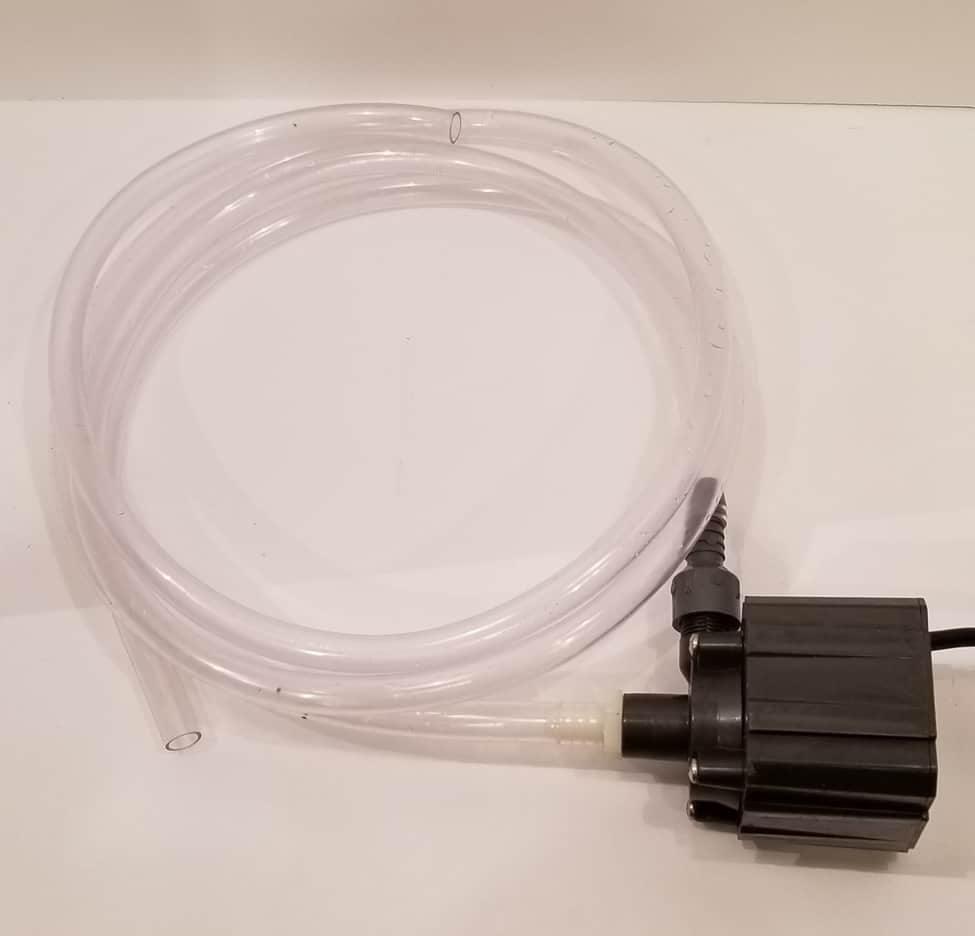
After much internal debate and research, I decided on trying to use an inline pump to create an aquarium vacuum that I could use to clean out my sump. I happened to have an extra Mag Drive 7 pump that would work well for this application. Mag Drive 7 pumps are usually used as return pumps in the reef aquarium and can be used in sump/water or outside water inline. The inline feature is particularly important for this application. Inline pumps allow for you to have water coming in from one line and out another line, while the pump sits outside of the water container I.E. sump or tank.
Mag Drive 7 Pump
Danner Manufacturing, Inc., Pondmaster Pond-Mag, Magnetic Drive Water Pump 250 to 3600 Series Pumps have been designed to handle virtually any application where water has to be moved.

Items Needed for an Aquarium Vacuum
For this project I used the following items:
- Danner Mag Drive 7 Pump
- Other pumps can be used, just be sure to use an inline pump and one that has sufficient flow to accomplish the task. The Mag Drive 7 is rated for 700 gallons per hour and is probably more than necessary for this task but does a great job. I probably wouldn’t want to go lower than half of what the Mag drive is capable of.
- ½” I.D. clear vinyl tubing about 2 3′ pieces (you may need more or less depending on your application)
Clear Vinyl Tubing – 1/2″ x 10′
Valterra’s Clear Vinyl Tubing is flexible, non-toxic, and resistant to corrosion. 1/2″ I.D. x 10′ length.

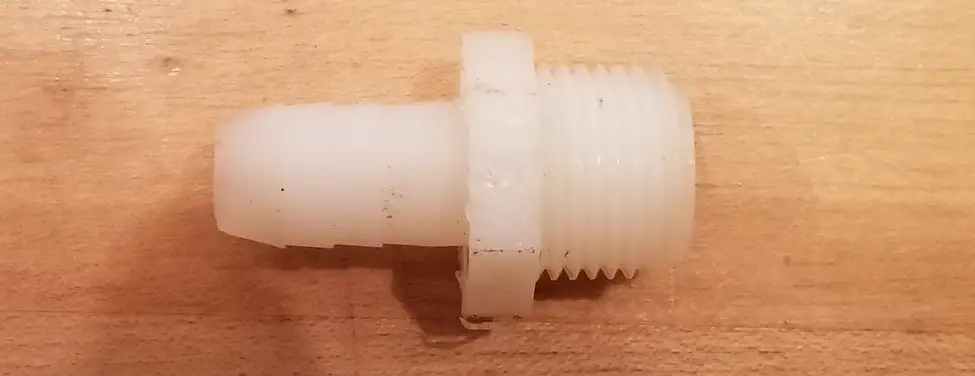
- Barb hose adapter
- For connecting vinyl tubing to the top of the pump. The size will vary based on your pump.
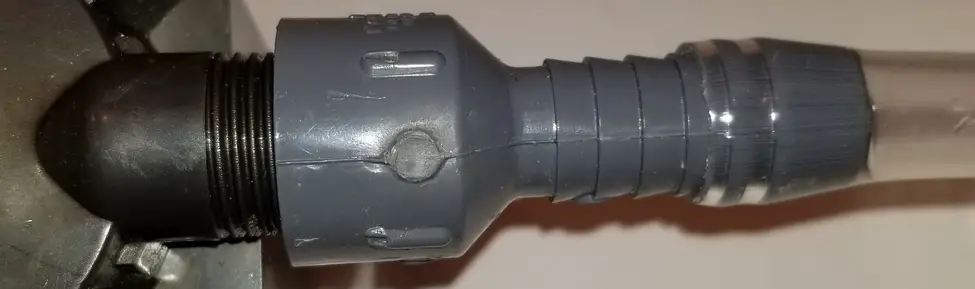
- Barb adapter
- For connecting vinyl tubing to the outlet of the pump. The size will vary based on your pump.
- Filter Sock
- I like to use the one that is currently in the system. Once I’ve completed vacuuming the sump I simply exchange the sock with a clean one.
![4 Pack - 4 Inch Ring Filter Socks 200 Micron - Aquarium Felt Filter Bags -4 Inch Ring By 9.5 Inch Long [Short Version] - Fits Eshopps and Aqueon](https://m.media-amazon.com/images/I/31VmiTxo1TL._SL500_.jpg)
I got the vinyl tubing and connections at my local home hardware store for less than $10. In most hardware stores they sell vinyl tubing by the foot. You’ll want to buy sufficient lengths to allow you to reach into the corner of your sumps and to reach where you will send the water to another container or to a filter sock in the sump. Depending on the pump you have you may need to use different sized adapters and vinyl tubing.
Setting Up the Vacuum
1. Take your spigot adapter and securely screw it onto the top of the pump. The top of the pump is where water will be drawn into the pump.
2. Take your barb hose adapter and screw it onto the outlet of the pump. You’ll want to make sure both adapters are on firmly so that there are no leaks when you are operating the vacuum.
3. Next, attach each piece of vinyl tubing to each adapter. If it is very tight and you are having a tough time making the connection, heating the tubing can help it soften up and attach easier. You can accomplish this by heating the end in hot water or using a heat gun. I’ve also seen people put vinyl tubing a clothes dryer to make it easier to handle. Be careful not to overheat the tubing and melt it.
Your vacuum is now ready for operation.
Operating the Vacuum
To operate the vacuum you will have the top end of the hose on the pump drawing water and debris from the location you are cleaning. The other end is where the water will exit after being pumped through the pump. You have a couple of options at this point. If you want to completely remove the water from the sump you can pump the water into a separate container to completely remove it from the system. The other option is to use a filter sock. Run the end of the outlet hose into a filter sock to capture vacuumed waste.
For my application, I just wanted to clean the sump without fully draining it. If I wanted to fully drain the sump and do a deep clean a Shop-Vac works better. You can see my article on how to do that HERE. The advantage of using a sock and the waste vacuum is you don’t have to shut off your system and can continuously filter water through the sock without impacting the water level of the system.
I used the existing sock on my sump and ran the exit line directly into it. I used a plastic hand clamp to secure the line so it didn’t pop out of the sock/sump while I was vacuuming. The other end goes into the section of the sump you want to cleanout.
Priming the Pump
For the vacuum to work I had to prime the pump. Priming a pump is when you add water to the pump so that much of the air is removed and enough pressure is created to allow for water to move through the pump when turned on. Very few pumps are self-priming and this isn’t usually a problem when the pump is sitting in water, but for this application, most pumps need to be primed to create suction. With the pump unplugged and the exit line secured to the sump and filter sock, I used a measuring cup to fill the intake line with water from the tank. Slowly pour water from the cup down the line. You’ll want to use a good amount so that you see some of the water you are pouring in making its way through the exit line. Once you have a good amount of water in the line and limited amounts of air bubbles, place the intake line in the water and chamber you are going to clean. Once the end is under the water, plug the pump in. The pump should turn on and begin moving water through the line. It may take a few seconds to get full suction as the air gets removed from the pump and lines. Ultimately you should see the water moving into the intake and out the exit line with little to no air bubbles trapped in the line.
Cleaning the Sump
I like to have the chamber clear of any equipment before cleaning it. On the first pass with the vacuum, I’ll pick up anything loose. After I’ve gotten everything that is loose I’ll use a scrapper or scrubbing pad to clean the tough stuff while the vacuuming is happening. Be sure to use an appropriate scrapper if your sump is acrylic so you don’t scratch it. I like to do a small section at a time and use the vacuum to suck up the algae and detritus that the scrapper loosens up. If you do too much at once and the system is on, the waste may make its way up into the display tank. Keep scraping and vacuuming until the section of the sump is up to your cleanliness standards. If your sump is very dirty, keep an eye on your filter sock. If the sock begins to overflow you may need to swap it out with a new one. If you plan on moving to another chamber keep in mind that when the tube comes out of the water, air will be sucked in and you may need to re-prime the pump to get it to suck again.
You’ll also want to be careful if there are large hard pieces of debris in the chamber you are cleaning. Sucking up pieces larger than the pump can handle could clog the pump or lines and possibly damage the pump. When this happens you lose suction. When a clog happens you will have to power down the pump, find the blockage and remove the blockage. The blockage typically happens on the inlet where the hose attaches to the pump. For this type of blockage simply remove the line and clear the blockage. If the blockage is inside the pump you may need to open the pump and clear any blockage around the impeller.
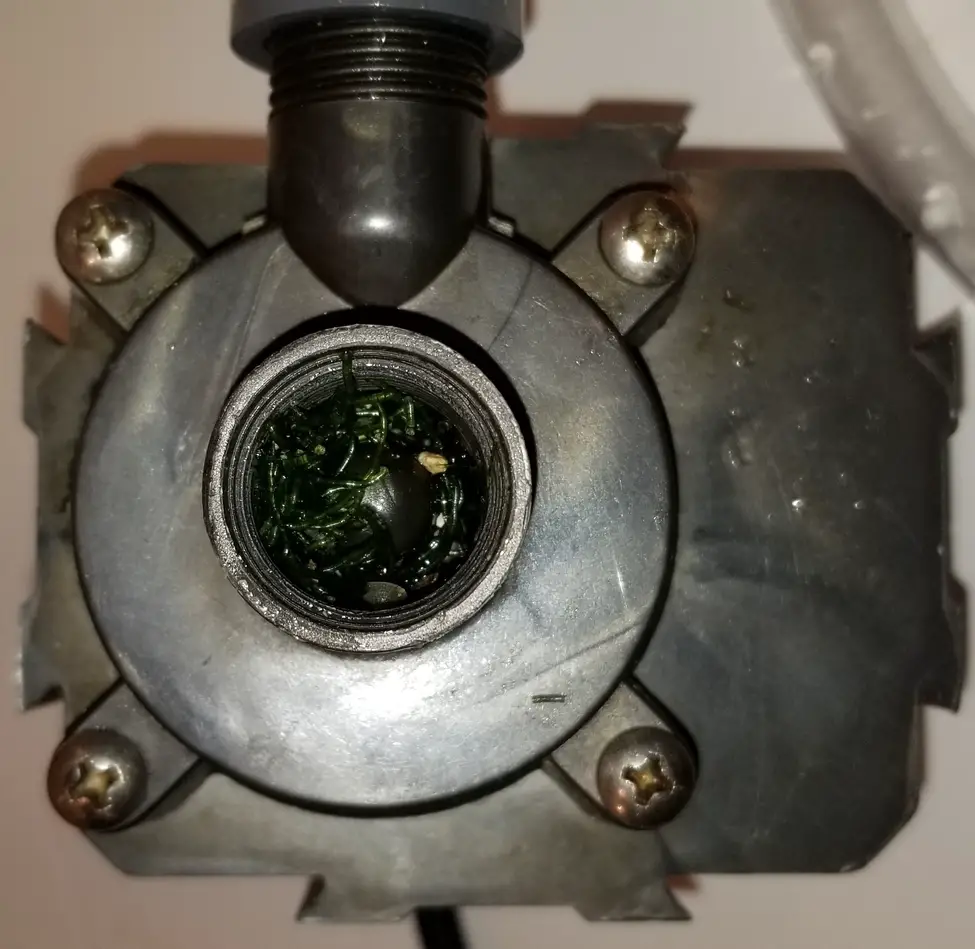
I used this method to clean out my refugium after removing all of the live rock rubble that I had on the bottom of the refugium. There was a lot of small rock debris and chaeto strands in the waste I was trying to remove. Before vacuuming I used a fish net to remove as much of the strands of chaeto and rock before using the vacuum. This worked well, but I still did experience clogged lines a couple of times. You’ll want to be especially careful around rocks and shells, if these go through the pump there is the potential for it to damage the pump’s internal impeller.
Once you have sufficiently cleaned the sump to your standards you simply unplug the pump and remove the lines and filter sock from the sump. The sock can then be rinsed off, washed, and put back in rotation for use in the sump. Using this type of vacuum can have other uses too including cleaning around rock work and even removing flatworms on Euphyllia.
Improving flow in the sump can also help keep detritus from settling. You can do this by installing a small powerhead in the sump sections where detritus tends to collect. I’ve seen setups where these powerheads were connected to a timer or an Apex Neptune controller and only turned on a few times a day to stir up any settled detritus. Vacuuming detritus every three months out of the sump is easy enough that I’ve not found the need to add additional flow in my sumps.
Using an inline pump vacuum is a great way to keep your sump clean. The first time I did this I noticed a remarkable change in coral poly extension and clarity of the water. It also feels great to open the cabinet doors and see a pristine clean sump. I now incorporate this task into my regular tank maintenance schedule. I do this about every quarter of the year or so. I find about every three months is about the right time where there are some built-up algae and detritus in the sump, but not enough time for it to be an issue or to cake on where it needs to be thoroughly scrapped. I can simply prime the pump and quickly vacuum out any settled detritus.
Old Tank Syndrome (OTS)
In the hobby, there is a condition called OTS or Old Tank Syndrome. Old Tank Syndrome is when a well-established once healthy aquarium begins to decline either rapidly or slowly over time. OTS usually manifests in algae breakout, poor water chemistry, or die-off of livestock in the tank. I think that OTS can usually be traced back to poor husbandry and spotty or poor cleaning and maintenance. I think that OTS can also be triggered when a reef keeper decides that enough is enough and does a radical change by completely cleaning the sump and tank all at once. The best bet is to stay on top of cleaning and maintenance and reach a point where the sump is clean and the sock, skimmer, and any other filtration equipment are doing their jobs in a clean environment. Using the sump vacuum is an effective tool in setting up and keeping a clean sump environment and should help reduce and mitigate the probability of OTS striking.