First and foremost, I recommend the use of RO/DI water in your reef aquarium. RO/DI water is treated to remove contaminants from water. This happens by passing water through various stages and filters until cleaner pure water is created. Having clean water will help with keeping your reef tank stable and free from potential harmful additive chemicals or other substances leach into your water as it gets to your home. Over the years it has become easier and more cost-efficient to make your own RO/DI water by hooking up a system within your home. Another option is getting water from a third party. Many local fish stores have their own system and sell purified water by the gallon.
AquaFX Barracuda RO/DI Aquarium Filter
Now Featuring High flow high rejection TFC membrane High efficiency 1-micron sediment pre-filter 2-micron chlorine guzzler carbon block pre-filter or our exclusive chlorine and chloramine-removal filters.
For the beginner reefer, there can be many constraints to utilizing only RO/DI water on their reef aquariums. Some of these constraints include cost for an RO/DI system, the pain of going somewhere and lugging heavy water, having space in your home for a system, and another factor could be poor maintenance at the source where you get your RO/DI water. Many reefers have successfully utilized tap water in their systems without issues. Your level of success with tap water will highly depend on where your water comes from, what is added, and if there are any issues with other substances getting into the water as it makes its way to your home. I recommend considering getting your water tested to see what is actually in the water and attempting to balance or buffer the water with additives and conditioners as needed.
I must admit that I used tap water in my early years of reefing. My home is connected to a natural community well and is maintained and tested regularly. My tap water had very few additives and low levels of nitrate. I found that my water worked well for fish and LPS coral. It was kind of a crap-shoot when it came to trying to keep SPS coral while using tap water. I would eventually set up an RO/DI system in my house and that along with other reefing husbandry improvements (light, flow, dosing, etc) I found much better results including keeping SPS coral.
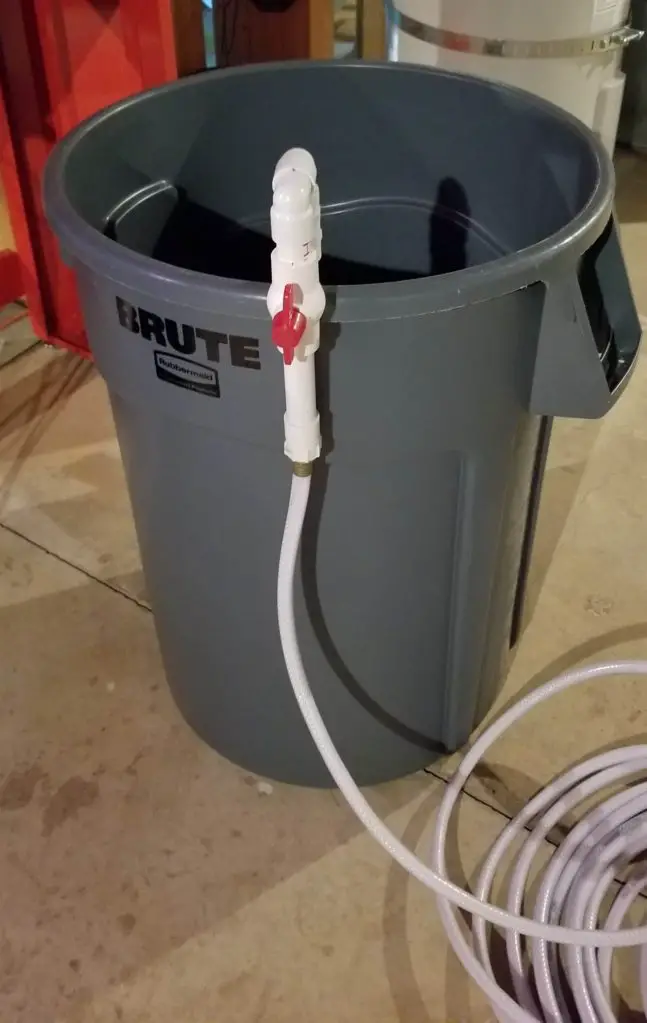
One frequent headache issue I had was filling my Brute trash barrels with fresh water from my garden hose. At first, I would simply place the hose in the trash can and start to fill it up. Inevitably and to my dismay, the hose would shift and shoot out of the barrel making a huge mess of water on the floor and under the fish tank where I couldn’t reach it. My probability of error would soon reduce when I started to use a plastic clamp to hold the hose in place at the barrel and on the tank when pumping water in the tank. The other folly was trying to stop the flow of water just right for the level I need. This involved watching the water rise and running out to the spout to shut it off at the right moment.
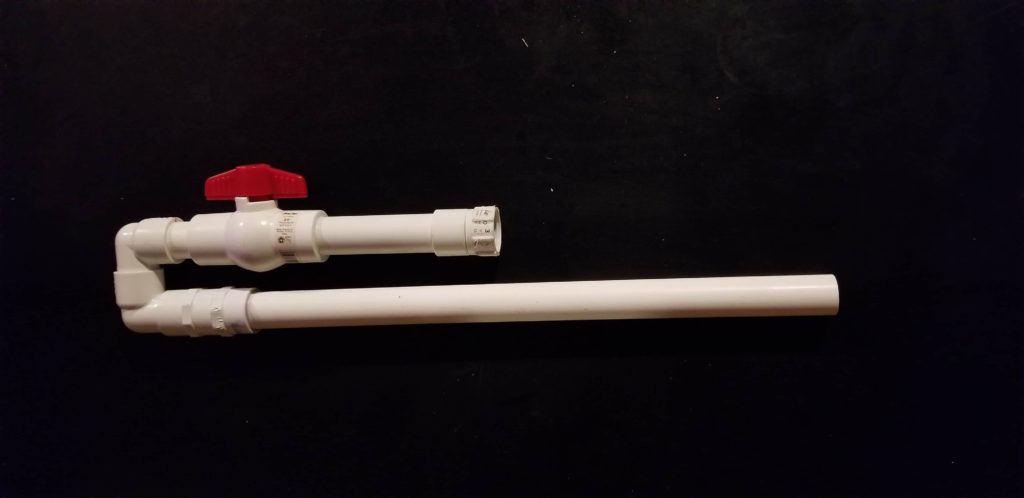
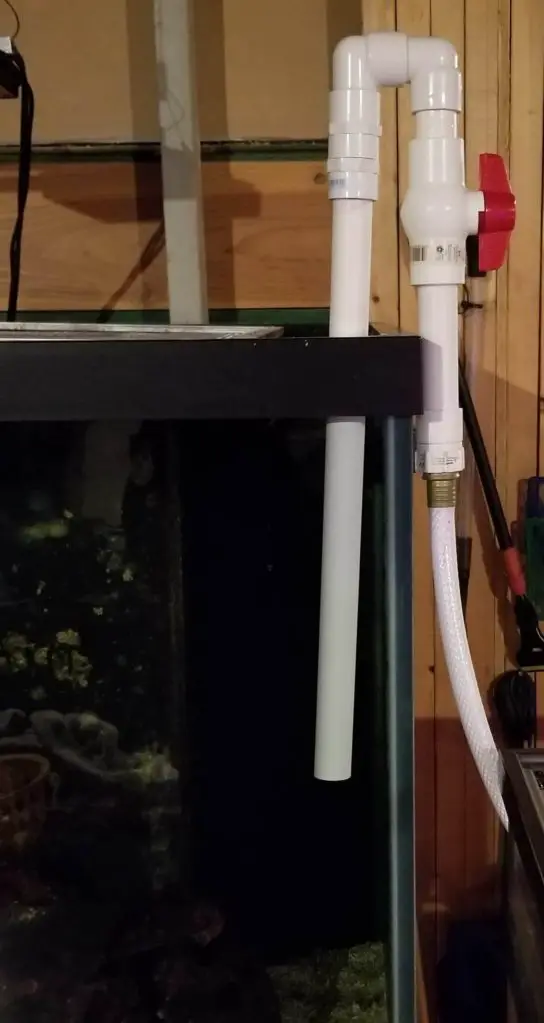
I greatly improved this process by building a PVC hose attachment that securely would hang from my barrels and my fish tank. It also has a ball valve to easily and quickly shut off the water going into the barrel or tank. When I was using tap water this attachment worked great and my spillage reduces greatly. I still use this when pumping fresh salt water into the tank. Here are the steps to create your very own garden hose water change attachment.
Items needed:
PVC Glue – PVC glue is used to bond PVC pipe and adapters together
PVC Primer – Primer is used to clean and soften PVC pipe before it is glued. Primer helps ensures a leak-free bond.
3/4” PVC Pipe – I used simple white schedule 40 PVC pipe for this project
3/4” Ball Valve – Ball valves can be turned to limit the flow of water through a pipe. These are usually best for applications where 100% or 0% flow is needed.
3/4” Garden hose PVC adapter – This adapter I used to connect your hose to the PVC piping.
Two 90 degree 3/4” Elbow adapters – Use these to bend your pipe run in 90 degrees.
PVC Cutting tool- There are different tools available to cut PVC including ratchet cutters, wheel cutters, and a general hacksaw will also work.
Optional
3/4” threaded adapter – You can use a threaded adapter at the end of your water change adapter to allow the use of multiple lengths of pipe. This adapter allows you to screw off a piece of pipe and screw on a different length of a pipe when needed.
Step 1
Measure out how long you want your adapter to be on the inside and outside of the tank/barrel. Typically you’ll want the pipe on the inside to be longer than the outside for stability.
Step 2
Measure how much space you want between the inside and outside of PVC tubes. You’ll want this pretty snug depending on the thickness of your tank/barrels that you are filling up.
Step 3
Once you have your measurements you’ll want to measure the inside of all your adapters and add an additional 3/4” PVC between the adapters to get the lengths you need for the inside pipe run, outside pipe run, and between the pipes.
Step 4
Next, you will want to cut the 3/4” PVC pieces. Try to cut as straight as possible to ensure leak-free work.
Step 5
Dry fit the entire adapter. Dry fitting involves using hand pressure to put the pieces together to make sure it will work for your setup. Starting on the outside you should have garden hose adapter > 3/4” PVC pipe > ball valve > 3/4” PVC pipe > 90 degree elbow > 3/4” PVC pipe > 90 degree elbow > PVC pipe threaded adapter > 3/4” PVC pipe

Step 6
Test the adapter. Try placing the adapter on your barrel and tank to check that it has a good secure fit. Also, test turning the ball valve off and on to ensure it is in the right position for your setup.
Step 7
Glue the adapter together. I like to mark the pipe and connection with a line at each connection so that when I go to glue it together I can match up the marks and it comes out like when dry fitted. Start at one end and apply primer to each piece that is being connected. Once the primer is on both pieces apply glue over the primer. Connect the pieces and match up the lines you made earlier. You’ll want to hold the two pieces together for about 30 seconds to make sure that the pieces don’t shift out. Continue this until the entire adapter is glued.
Step 8
You’ll want to wait at least 2 hours per most glue specifications before testing. It should be fully cured after 24 hours. Simply hook your hose up and test to make sure there are no leaks.
This was a vast improvement over the clamp and I continue to use it to this day when I manually pump and drain saltwater to and from my tank. I found this to be a simple and cheap way to greatly reduce the amount of water spillage when utilizing the garden hose for maintenance.

Step by step instructions on how to make a garden hose attachment to assist in water change of your reef tank.


