One of the most common leaks on an aquarium is a slow drip leak at the point where aquarium water transfers from the display tank to plumbing and out of the tank. In common saltwater aquariums, the water is drained into a sump where it is filtered through various chambers and returned to the tank via a return pump and plumbing back into the tank. The point where water transfers to and from the tank is usually through a plumbing accessory called a bulkhead. Bulkheads are one of the most common leaks on an aquarium and usually manifest in a slow drip leak after a tank is first set up or randomly at some point in the life of the tank. There are several reasons that a bulkhead could start leaking.
Fixing a leaking aquarium bulkhead comes down to identifying the root cause of the leak and taking action to resolve it. Action steps could include tightening the bulkhead, proper installations, and cleaning the surface area and bulkhead to ensure a tight fit.
In this article, we’ll go through some general information about bulkheads, the root causes of a leaky bulkhead, and how to resolve bulkhead leaks.
What is an Aquarium Bulkhead and What Does it Do?
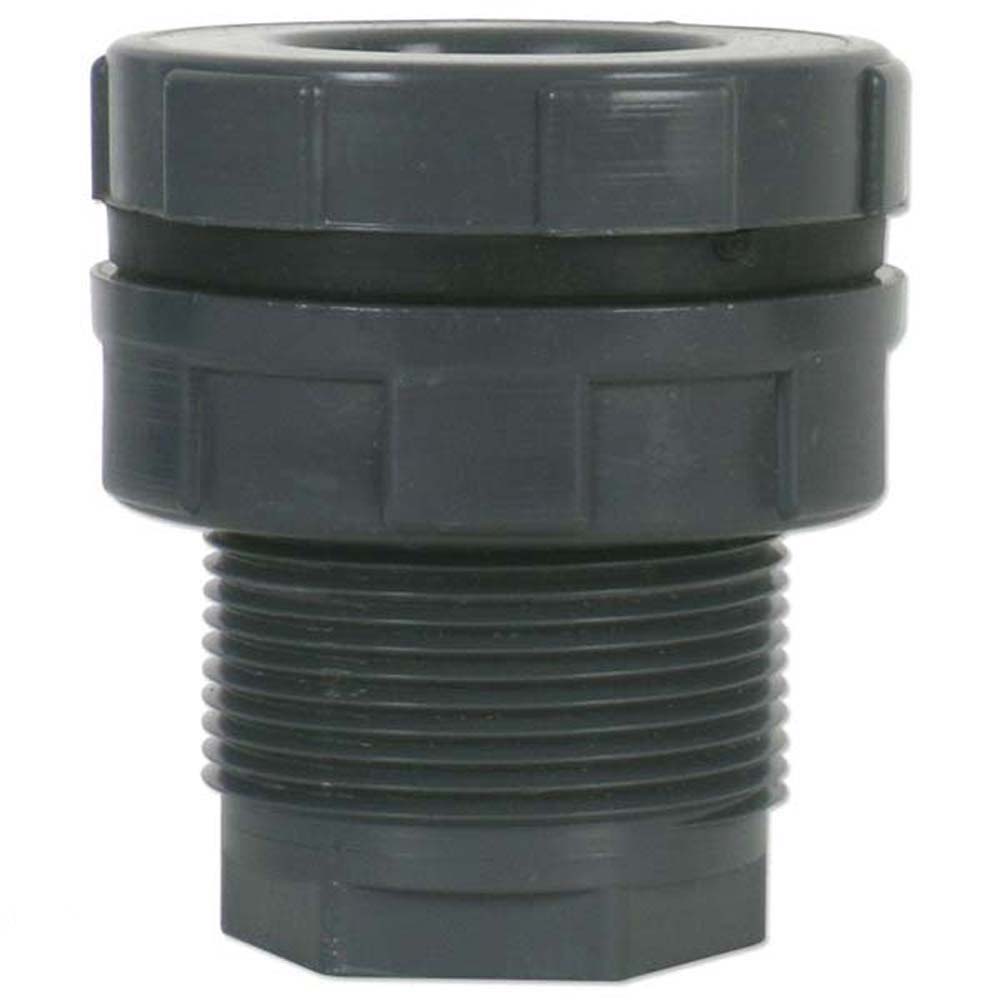
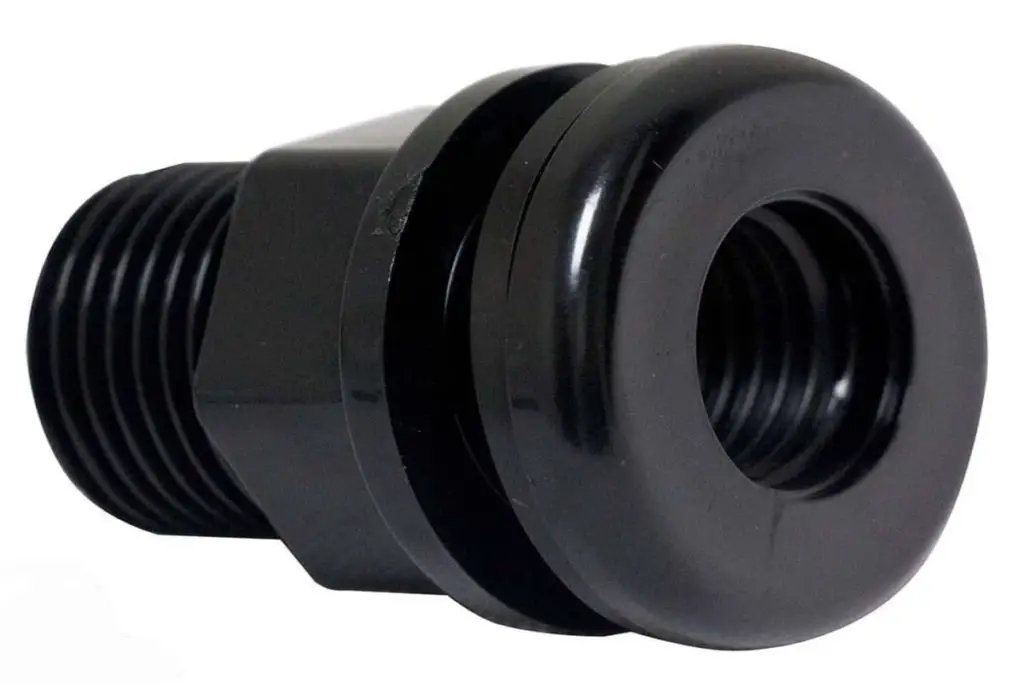
An Aquarium bulkhead is a plumbing device that allows water to transfer from the display tank to plumbing. The aquarium’s water flows through a bulkhead typically gets drained into a sump or is returned to the tank via a return pump. With most bulkhead installations a hole is drilled into the display tank where a bulkhead is installed. The bulkhead slides through this hole and uses a nut to tighten the bulkhead to the back of the tank. A rubber gasket is also used to keep water from leaking out of the bulkhead.
Bulkheads can have different options on both ends to allow different types of plumbing to be attached including slip and threaded connections. High-quality properly installed bulkheads are excellent plumbing components and usually can last the life of a tank.
Where are Aquarium Bulkheads Found on Tanks?

Bulkheads can be found in various points of a reef aquarium system and are usually found where water is transferred from one component to another like the display tank to the sump. The two most common places to find a bulkhead are where the tank drains into the sump and where the tank gets back the water from the return pump. Exact locations will depend on the size of the system and how it is set up to cycle water through the system. On my 210-gallon mixed reef tank, the system is plumbed with two overflow towers in the tank with a drain and return line in each overflow tower. So my 210 tank has 4 bulkheads, 2 in each overflow tower that are drilled and installed into the bottom of my tank. On my 75 gallon tank, I have a single overflow box attached at the back top middle of the tank. Another commonplace to find bulkheads is where plumbing attaches to the sump. On my Trigger Systems Emerald 39 sump, there are two drains where PVC plumbing attaches to bulkheads on the sump. Some setups use a return pump that is external to the tank and sump. Usually, with an external return pump, a bulkhead is used to connect the return pump to the sump via plumbing.
Why do Aquarium Bulkheads Leak?
Nothing is more frustrating than setting up a new system only to find leaks in your plumbing. It can also be very detrimental to your aquarium or your house if a bulkhead fails randomly in the life span of your tank. Here are some of the reasons that a bulkhead could leak:
- Installed incorrectly: This is probably the number one reason that causes a bulkhead leak. Bulkheads must be properly installed for them to function correctly. Proper installation includes putting the gasket in right the location, using the right size, and tightening enough without over-tightening. Sometimes gaskets get forgotten, and a system could go leak-free for a time without one, but eventually, it will start leaking.
- Not installed on a clean flush surface: Sometimes things like rocks and sand could get under the bulkhead seal. When this happens a small gap could form allowing water to leak through. This has happened to me on my 210 where I have the bulkheads on the bottom of the overflow box where sediment tends to collect. If the plumbing gets bumped the bulkhead could move allowing sediment to get under the seals and form a leak.
- Gasket seal fails: Overtime a bulkhead gasket could just fail. A thin rubber gasket is all that is preventing a leak. This rubber gasket is always under pressure and exposed to corrosive saltwater. They usually will last a long time, but it is another point of failure.
How to Diagnose the Cause of the Bulkhead leak?
If you have sprung a leak at your bulkhead the first thing you’ll want to do is inspect the bulkhead to see if you can pinpoint the issue and take action to fix it. Sometimes this is easier said than done depending on where your bulkhead is and what access you have to it. The first step is to drain the water from your tank or overflow box below the point where it continuously drains into the sump. Usually, this is simply accomplished by shutting off your return pump. On many systems, the overflow box will reach a point where it stops draining and you will then be able to work on the bulkhead.
However, it can be harder than that based on the plumbing of your tank. On my 210-gallon reef tank, after I shut off the return pump, both overflow towers have to be manually drained before I can work on the bulkheads. I usually accomplish this with a siphon or shopvac.
It’s important to save the water to put back into the tank or have new water on hand for after you work on it.
How to Fix a leaking Aquarium Bulkhead
Once you have gained access to the bulkhead and don’t have to worry about water leaking when working on the bulkhead you can then move onto diagnosing and fixing the leak. The steps are to remove the bulkhead, inspect the bulkhead, replace the gasket or bulkhead if necessary, clean the surfaces of the tank and gasket, properly install the bulkhead, and finally test for leaks.
Removing the Bulkhead
Removing a bulkhead is usually straightforward. A nut usually is secured to the back or bottom of the tank and simply screws off counterclockwise. Sometimes you can use just your hands to unscrew the nut. If it is too hard to do with your hands there are special bulkhead wrenches that can be used or a set of channel lock pliers. Be very careful when using tools on the nut and near the tank. Be careful not to slip and smash the tool into the glass. Also, be careful to make sure you are turning the correct way. If you over-tighten the nut you risk the chance of cracking or shattering your tank. Once you have the nut off the bulkhead it should simply slide out of the tank.
Inspect the Bulkhead
After removing the bulkhead from the tank give it a thorough inspection to check for any damage to the bulkhead itself, debris between the seal and tank, and check the conditions of the rubber gasket. Also, check the tank to ensure the hole has a clean-cut and hasn’t cracked where the bulkhead sits.
Replace the bulkhead, gasket, or tank as necessary
If your tank is damaged there isn’t much you can do at this point short of replacing it. If there is damage on the tank you risk it getting worse by continuing. It is probably best to replace the tank if the tank itself has been damaged.
The main piece that usually causes leaks is the gasket. Check to make sure that the gasket is still rubber and not cracked or otherwise broken. If the gasket has seen better days it is best to replace the gasket.
Sizing the gasket can be tough unless you know the exact bulkhead brand, size, and they offer replacements.
Sometimes it is easier to buy a whole new bulkhead with a gasket if you are going to replace it. But if you have a replacement gasket or one very close in size and thickness it may work.
If your bulkhead has damage replace the bulkhead.
Clean the surfaces of the tank, gasket, and bulkhead
To get your best shot at a leak-free seal, you’ll want to make sure that all the surfaces of the tank, gasket, and bulkhead are as clean as you can get them.
Thoroughly wipe off with water and a rag all the surfaces that are touching together then dry well before reinstalling. I like to use an alcohol prep pad to clean the surfaces as it will thoroughly clean the surfaces and remove any oils that may exist on the surfaces.
Alcohol Prep Pads Medical-Grade Sterile Individually Wrapped
Designed for convenient, on-the-spot sanitization of skin, the Medpride alcohol prep pads are an essential antiseptic means for any medical institution, as well as First-Aid Kits at home.

Properly install the bulkhead
This is the most important step and where you will fix most leaks. The biggest thing to remember is to put the rubber gasket on the inside or wet side of the tank. Installing this incorrectly will surely lead to a leak. Some rubber gaskets are smooth on both sides and some have a ridge on the side. Gaskets with the ridge are designed to help keep debris from getting in and breaking the seal. If your gasket has a ridge place the smooth side on the bulkhead first so the ridge makes contact with the glass. Place the rubber gasket on the bulkhead then slide the gasket through the hole in the tank.
The next step is to tighten the nut on the bulkhead.
With one hand hold, the bulkhead flush with the tank and try to center the gasket so that there is even coverage around the hole. Tighten the nut with just your hand going slowly to ensure you are not cross-threading the bulkhead and nut. Tighten down the nut so that it is just firmly hand tight. At this point, it is optional to tighten a tiny bit more.
Use your bulkhead wrench or channel locks to tighten up a tiny bit, like half a 1/4 turn or so. Again, be very careful not to over-tighten as you risk the chance of cracking your tank. Also if you tighten too much you might over-compress the gasket which again would cause a leak. Once installed it’s time to move onto leak testing.
Leak Testing
After properly installing the next step is to fire your system up to leak test your work. Turn your return pump on and cross your fingers. If you had to remove water from your system, make sure to re-add at this point.
If you’re bulkhead and gasket are good, clean, and installed properly you should be looking at leak-free bulkhead for years to come.