
My first reef tank was a 55-gallon top fin aquarium that I purchased as a freshwater kit from Walmart. Like so many newbies in the hobby at the time, I ran this tank sumpless with a canister filter. After a year of some success with mostly failure and a pretty unstable aquarium, I decided to upgrade the tank and add a sump to the system. After a year of reef keeping my knowledge of the hobby had grown tenfold and I saw other reefers achieving great success with a sump at the heart of their systems. I thus began putting together a plan for adding a sump to my 55-gallon tank origin tank.
I started my planning process with where I would put the sump. For my setup and location, the only option was to put the sump in the bottom of the tank’s stand. I also knew that I wanted to run an in-sump skimmer so the height would have to be a consideration too. The cabinet that came with my freshwater kit did not have a lot of room for a sump and skimmer. In the middle of the stand was a brace that ran from the entire front to back of the stand right in the middle of it. This effectively cut the stand in half. I was pretty sure that this was a weight-bearing piece so removing it was not an option. To resolve this I had to find a sump that would fit on just one side of the stand fitting between one of the ends and the middle brace.
There was also a height constraint with the stand. The stand had 3 pieces of wood that touched the ground, 2 on each side and the middle piece as mentioned above. The floor of the sump between the three pieces was elevated about 6” off the ground and screwed into each piece of wood. With the floor of the stand elevated 6” there was not enough room for a sump and skimmer.
To resolve these constraints I found the perfect sump for the job, an Eshopps RS-75 third-generation acrylic sump. This is a great little sump that is on the smaller size and has just the right features for small applications. You can my recommendation review of the sump here:
ReefSumper Recommends: Eshoppes RS-75 Third Generation Sump
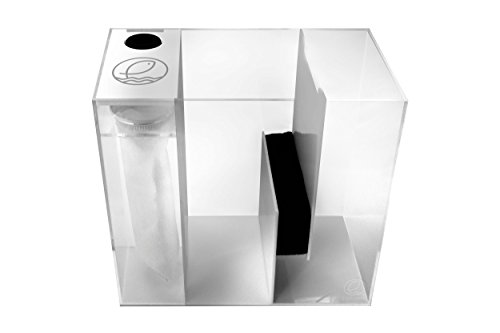
The sump fits perfectly on one side of the stand. I also choose an Eshopps S-120 Snow Cone skimmer to go with the sump. This skimmer has and continues to work well for me throughout the years. With the sump and skimmer, there was no way they would fit height-wise. My solution was to cut out a section of the stand so that the sump would sit directly on the floor versus on the elevated stand base. This worked out well and I had just enough room to remove the skimmer collection cup for maintenance.
After solving the sump equation I then focused on plumbing. I had to figure out how to drain and return water to and from the display tank. After researching the topic I found many different options including different overflow boxes, drains, and plumbing options. I got excited about potentially having a Herbie or a Bean Animal Style drain as they are proven to be very silent and safe to operate. I was pretty set on drilling and incorporating one of these methods to drain water into my new sump.
After settling on a drain type my next research led me to the process of drilling holes in an aquarium. To add an overflow box you need to drill holes in the glass, install bulkheads, and plumb in your drains. To my surprise, I encountered another constraint, tempered glass. It is not possible to drill a tempered glass aquarium. Attempting to drill a tempered glass aquarium will result in the tank glass shattering. I wasn’t quite sure if my entire tank was made with tempered glass.
What is Tempered Glass?
Tempered glass is glass that has been strengthened through a manufacturing process. During the manufacturing process chemicals and heat can be added and specific points of the process to increase the overall physical strength of the glass. Most of the time with tempered aquarium glass, the glass is heated to a very high temperature and cooled rapidly to temper it. Surface compression and tension on the glass are a result of the tempering process. When tempered glass is broken or further stressed, it will shatter into smaller pieces making it much safer than normal glass. Normal glass will often break into larger razor-sharp shard pieces that have a higher probability of serious injury in the event it breaks.
Tempered glass is required in some building applications and in things that are high risk and involve glass. You will often find tempered glass in passenger vehicles, diver’s masks, and in building windows. The disadvantage to tempered glass is that it can’t be modified, ground, or drilled after tempering. Any holes or shapes must be done before tempering.
Why is Tempered Glass Used in Aquariums?
Simply stated tempered glass is many times stronger than regular glass. Water, sand, and rocks weigh a lot, and as much strength as you can get out of your aquarium and stand is a welcome safety feature. With that said it does make it hard to change the setup or add a drain later on. An aquarium with proper glass thickness and construction should not need to be tempered. Most tanks today are not tempered and if they are, it is usually only the bottom piece is tempered.
How to Determine if you Aquarium Uses Tempered Glass
There are a few ways to determine if your aquarium is tempered:
- The tank is marked. You will typically see a sticker or a tag somewhere on the tank that identifies the tank as tempered. Sometimes the tag will state not to drill or that only the bottom is tempered. Often these tags are located in one of the corners of the tank.
- Take the tank to a glass shop. A good glass shop through experience and equipment should be able to quickly tell you if your glass is tempered or not.
- If you know the manufacturer of the tank you can try to contact them to determine if tempered glass was used. Sometimes you might find a model, manufacturer and/or serial number somewhere on the tank. You can use this information to check a manufacturer’s website as they often have the tempering status of their individual tanks online. You can also try calling or emailing the manufacturer for tempering information.
- Since tempered glass cannot be modified after treating, it is often rarely without imperfections or straight. If you look closely at the edges you will often find slight curves or waves on the edges. This is not a surefire way to tell tempering or not but can give you a hint. I would confirm with other methods in addition to this one before drilling.
- You can use a pair of polarized sunglasses to identify tempered glass. Make sure the glasses you use are polarized and look at the glass from about a 45-degree angle. If the glass is tempered you will probably see black lines on the glass. The black lines are an indication of the compression throughout the glass.
The other way to tell if your aquarium is tempered or not is to drill it, if you successfully make a hole it is not tempered and if shatters into a thousand pieces it was tempered. This is not the best way to find out. You will want to use multiple methods to determine tempered or not and be as close to 100% certainty as you can before drilling your tank to avoid shattering it.
Back to the 55 Gallon Tank Upgrade
It was no easy task determining if my 55-gallon tank was tempered or not. There was a sticker on the bottom of the tank, but it was not very clear if all panels were tempered or just the bottom. I knew the manufacturer of the tank and had a general idea of the model of the tank. The manufacturer’s website had a decent amount of information about many of the tanks they produced. In the end, I found multiple versions of my tank with some being tempered, some not, and some only the bottom panel. I read a few forums and also found a mixed bag with most people saying that the whole tank is tempered. My next test was to deploy the polarized sunglass method. When I did this I could see the black temper lines on all of the panels. Drilling would not be an option.
Options to Connect a Sump with a Tempered Glass Tank
There are only two viable options for draining water into a sump. The first is to use a hang on the back overflow box. The second is to DIY a drain using PVC and other materials. I found the DIY options to be not the safest or most visually appealing way to drain water into the sump. It would have probably taken a lot of time to construct, test, and tweak to get it to accomplish the job a HOB overflow would do right out of the box, so I went with the HOB overflow option. For my application, I choose the Eshopps PF-800 overflow box.

Hang on the Back Overflow Boxes
There are many options on the market for hang on the back overflow boxes and most generally function in the same ways. No drilling or trimming of the tank is usually needed to install a hang on the back overflow box. Hang on the back overflow boxes use a U-tube and siphon to pull water up and over the display tank into a box and down a drain into the sump. In most overflow boxes the skimming box inside the tank adjusts up and down to set the water level in the tank. The U-tube has one end in the tank water and its other end in the overflow box outside of the tank. In the overflow box outside of the tank there is usually a drainpipe and some sort of a noise reducer like a sponge filter. Once the overflow box is installed a small piece of airline hose is inserted into the U-tube to suck the air out of the tube and start the siphon. Usually, this siphon will hold and restart when the return pump turns off and on.
A big disadvantage of using a siphon overflow box is the chance the siphon breaks and causes a flood. If the siphon breaks while the return pump stays on, draining stops and as the water returns from the sump it could overflow the display tank and end up all over the floor. One remedy to this is to use a small pump, like a Tom’s Aqua lifter to ensure that air is continually being removed from the siphon in the U-tube to help prevent a siphon break. I never used a secondary pump for this purpose and never actually experienced a siphon break flood. If you read reviews on overflow products and forums you will see that flooding because of siphon breaks has happened to many a reefer and if there is a chance, chances are that it will happen at some point. Another disadvantage for me was the noise that these can produce. I constantly had to fiddle with the overflow to get the box to not have variable gurgling sounds.
Eshopps Overflow Boxes Pf-1200
Any aquarium up to 200 gallons; Easy to setup design; Dual drain design in case one gets clogged; A very quality product from the manufacturer.
Completing the Upgrade
After installing the overflow box I completed the plumbing using Eshopps drain hose and vinyl tubing for the return line. Here is a list of all the components I had in the sump upgrade:
- Overflow Box: Eshopps PF-800
- Drain line: Eshopps Drain Hose
- Sump: Eshopps RS-75 Third Generation
- Filter Socks: 6” x 12”
- Skimmer: Eshopps S-120 Snow Cone
- Chemical Filtration: Small mesh bag of Carbon between the skimmer section and return
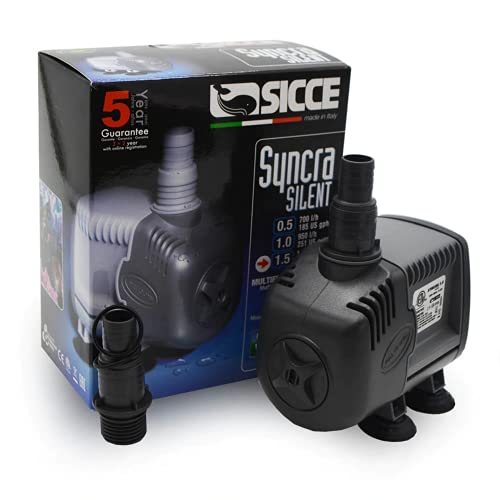
- Return Pump: Sicce Syncra Silent 1.5
Return Pump: Sicce Syncra Silent 1.5
Syncra Silent pumps are ideal for freshwater and marine aquariums, protein skimmers, water-cooling, indoor and outdoor fountains, and for any other application that requires a high performance, extremely silent pump.
- Return Line: Vinyl Tubing and PVC at top of the tank
- Heater: Aqueon 100 watt heater. I was able to move this from the display tank to the sump
Aqueon 100 watt Heater
Aqueon Submersible Aquarium Heaters are made from thermal shatter-resistant quartz glass and designed to absorb impacts, making them extremely durable.

- Return line: I was able to use the return line from the canister filter to hang over the tank complete with a y splitter and two Loc-line returns ends
Once I had everything up and running the inclusion of a sump onto the 55-gallon tank was a big boost to the stability and health of the aquarium. I immediately banished the nitrate factory canister filter. Algae blooms slowly started to pull back, water clarity was improved, and clean purple rocks appeared in the tank. I had less fish loss and coral loss in the tank. I had much more success and my reef-keeping satisfaction levels went up with the upgraded tank.
Looking back at it now, I did learn a lot and this upgrade process did take my reef-keeping knowledge forward quite a few steps but I would probably have done it differently in hindsight. I would eventually build out a new 75-gallon tank with a proper drain and far fewer constraints than I encountered with the 55. I would not recommend using an over-the-rim overflow box on any setup. If your tank is tempered and this is the only option, I think I would rather break down and start from scratch. That is eventually what I did with the 55 and was able to recoup some cost selling the aquarium and some of its components. I sold the tank as a freshwater tank. The risk of failure and flooding is way too high using an over-the-rim siphon-driven overflow box and the noise and constant tuning of the drain just aren’t worth it.